Wednesday 31 October 2012


Scaffolding has now come down - It's looking good can't wait to get the doors and roof lantern in.
Here you can see a spreader plate resting on the insulation board. The board was 18mm below the top of the joists by fitted batons running along the joist. Tape has been used to seal the gaps between joist and insulation. Need to keep an eye on the tape to check it stays in place!

Monday 29 October 2012

This floor is going to be the death of me!

My eMail to the Plummer today


Hi Mike,

Just when you solve one potential problem another rears it's head!

I was talking to polypipe about their heat spreader plate system (I'm a neard for the technical detail as you have probably gathered!).
They mentioned how important it is that for the system to work properly that the spreader plates are supported by the insulation board along their length.
This ensures good contact with the floor surface - any air gap at all apparently seriously reduces the efficiency of the system.

Polypipe advised the insulation needs to be fitted 18mm below the joist level and made as air tight as possible.
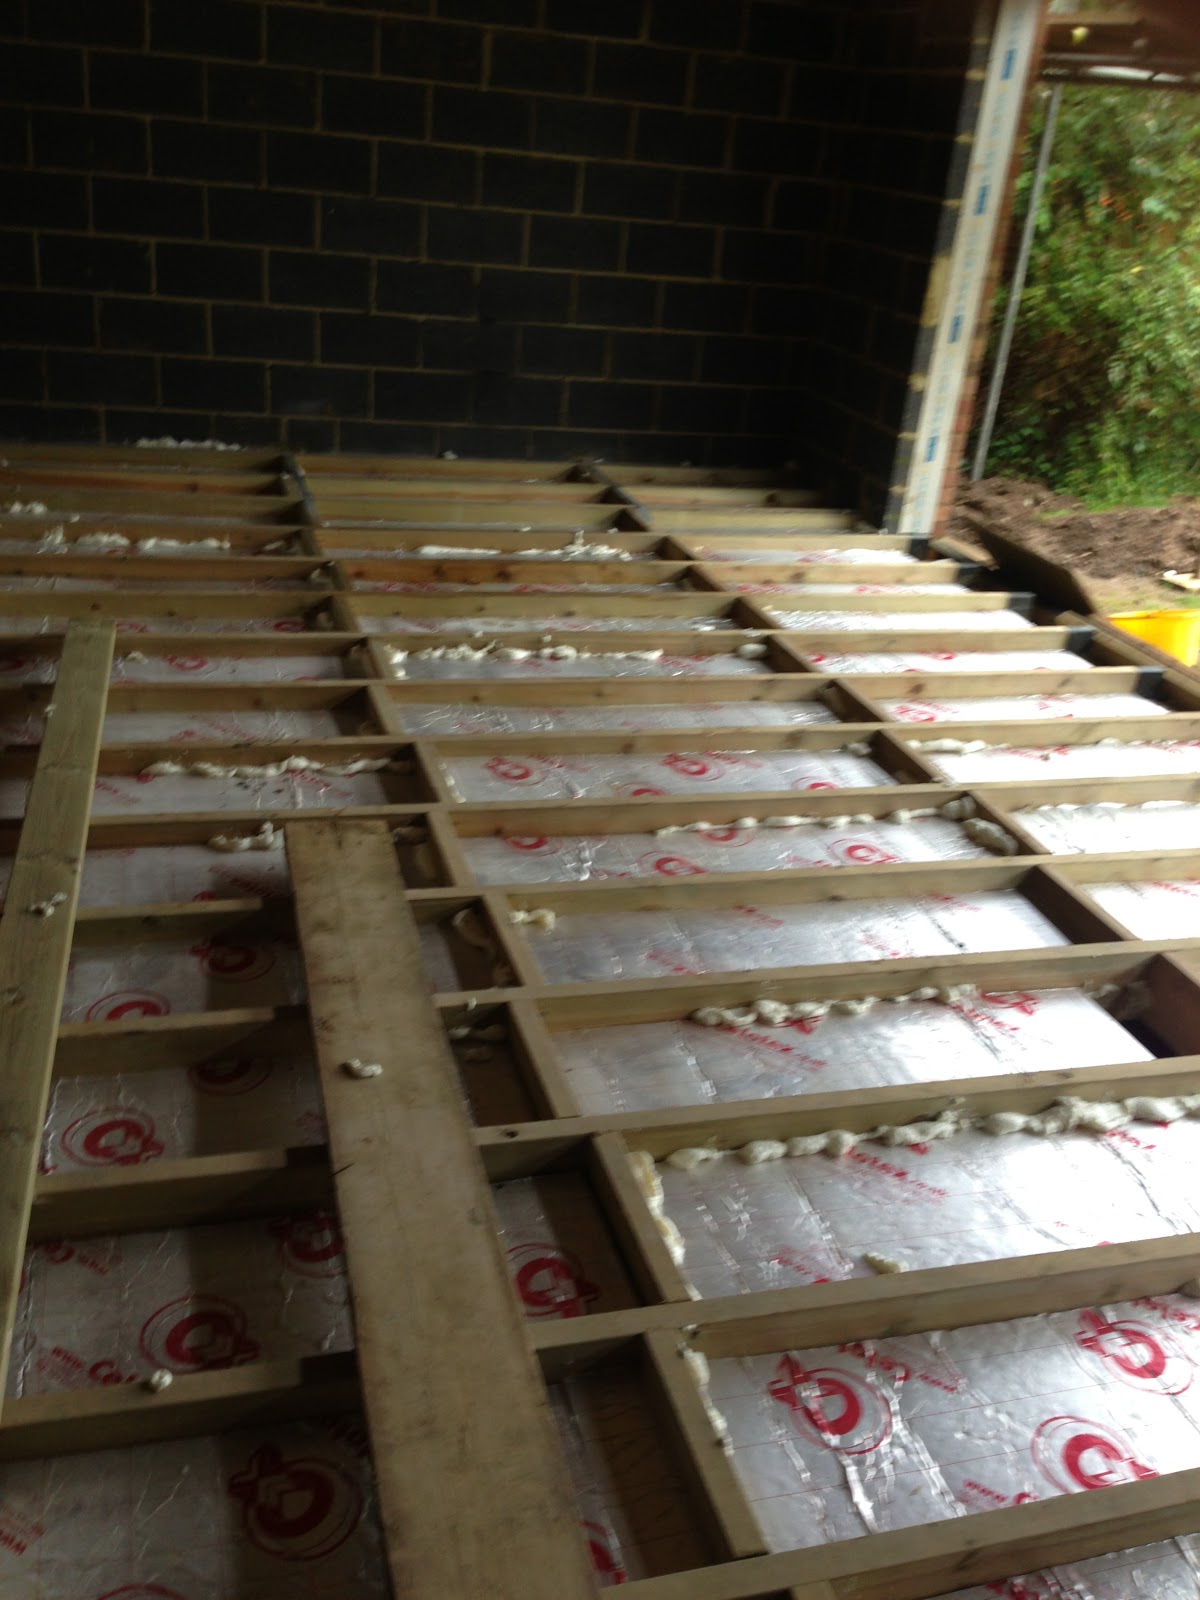
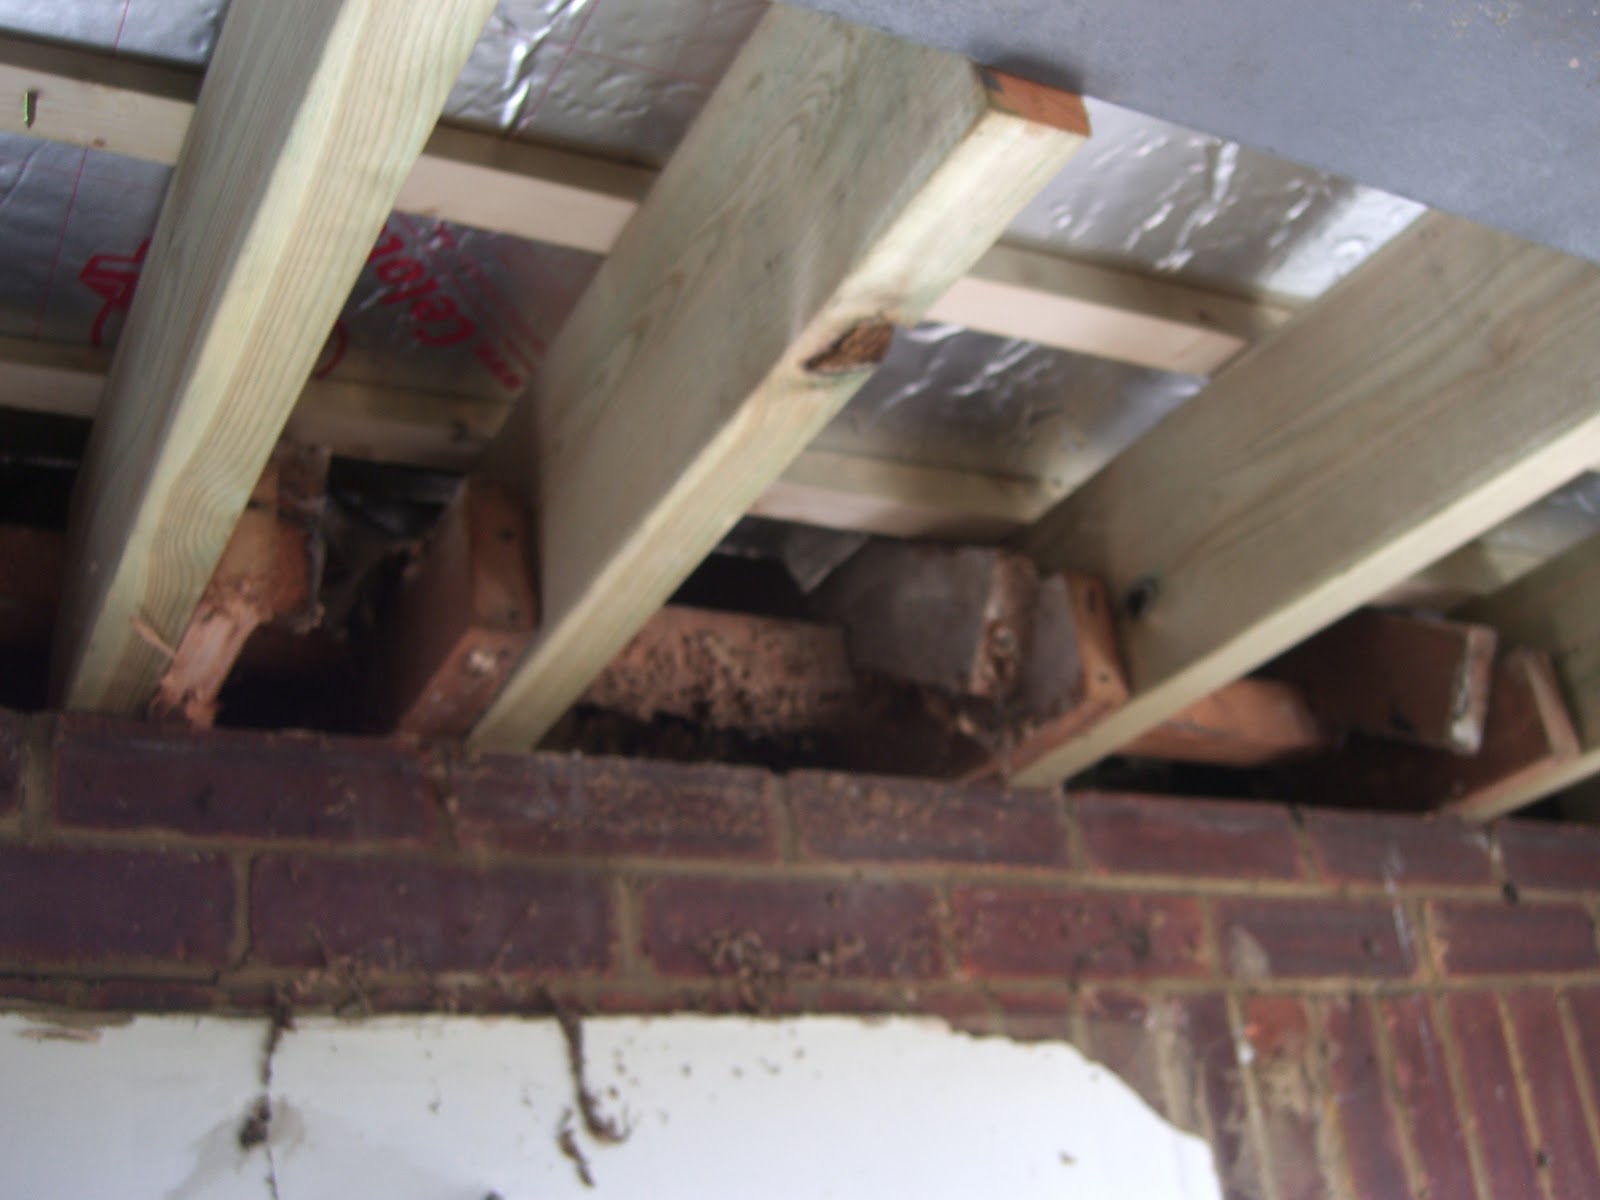
Currently the insulation is resting on battons which run across the bottom of the joists at 90 degrees.

So the insulation will need to come out and battons added to the joists to supoprt it at 18mm depth.
I'm gutted as I spent a weekend sealing the boards with foam and silicon!

I realise I'm hitting you with another issue and you haven't even put a foot on site yet, but its alot of money to be spend and it seems there is real potential for the UFH not to work as well as it should if it's not installed to the manufactorors instructions. I did mention to nick before he put the insulation in that the air gap between the top of the insulation board and the floor covering needed to be minimised, but I did not know enough about the system at the time to insist it was made 18mm. Hopefully adjusting the insulation won't a big deal.

What do you think?

Mike

Coping is on

Nick and his crew got the coping on this weekend. I think it looks great.
The morter looks a bit dark at the moment, but I'm hoping it should dry out to be the same as the brickwork.

The scafoling should come down this week and Nick can finnish the guttering and soakaway.

No sign of the plummer yet, I think he they should start this week. They'll need to take up the kithen floor to get gas to the other side of the kithen where the boiler is going.

Still 4 weeks until the glass is due to arrive...


Wednesday 24 October 2012

How the hell am I going to get the floor tiles?

Ditra Matting on top of chipboard is a no no.
Looks like it will be necissary to lay 12mm ply ontop of the chip board.
But will the underfloor heating stil work???? Oh man!


Dear Michael

Thank you for your enquiry.

Prior to laying Schlüter®-DITRA the floor should be even, rigid and load bearing.  The use of a spreader plate system precludes the use of noggins to support the board joints, these are required to ensure a rigid substrate.  

Furthermore, Schlüter®-DITRA needs to be bonded to the substrate, chipboard flooring with an impregnation layer does not allow for a successful bond.

We are therefore unable to recommend  Schlüter®-DITRA for this application.  However, should you require any further assistance in the future please feel free to contact us here at Bardon 22.

Yours sincerely


Andrew Curry
Trainee Business Development Manager

Schlüter-Systems Ltd
Units 4-5 Bardon 22  .  Beveridge Lane
COALVILLE  .  Leicestershire  .  LE67 1TE                            

Tel:       +44 (0) 1530 813396
Fax:      +44 (0) 1530 813376
Email:  
sales@schluter.co.uk
Web:    
www.schluter.co.uk  .  www.bekotec-therm.co.uk  .  www.kerdi-board.co.uk

Co Reg No:  2853384  .  VAT No:  616 7336 35


Please consider the environment before printing this email

This email is strictly confidential and intended solely for the person or organisation to whom it is addressed. It may contain privileged or confidential information. If you are not the intended recipient please notify us as soon as possible. In this event you should not copy, distribute or otherwise act on the content hereof. All email traffic through Schlüter-Systems Ltd is checked with anti-virus software. Any views or opinions presented are solely those of the author and do not necessarily represent those of the company.


From:        Michael McAndrew <Michael.McAndrew@henderson.com>
To:        "technical@schluter.co.uk" <technical@schluter.co.uk>
Date:        22/10/2012 14:39
Subject:        Ditra Matting advice - Tiling on chipboard with underfloor heating


Good afternoon,
 
My builder is installing a wet under floor heating system to the suspended floor in my new ground floor extension (polypipe spreader plates).
He is then going to lay 22mm weatherproof chipboard onto the joists. I want to have the floor tiled, but want to make sure I specify the correct construction and to make sure this will not adversely affect the under floor heating.
 
1.     Can you recommend what products I should be used to prepare and bond the Ditra matting to the chipboard?
 
2.     Would the chipboard need to be prepared in anyway (somebody suggested the weather proof surface would have to be sanded to get a good bond)?
 
3.     Can you recommend what adhesive and grout I should be used to bond porcelain tiles to the Ditra matting?
 
4.     Would you expect the matting to reduce the efficiency of the UFH?
 
 
Thanks in advance for your advice,
 
Regards,
Michael McAndrew
 

Sunday 21 October 2012

Floor Insulation Part 2

Got all the gaps in the floor sealed. It took me a full day to seal all the gaps using expanding foam and mastic sealler, but I'm comfortable it will nice and cosy now once the underfloor heating is in, not to mention saving me a few bob in the long run!


I wasn't best pleased that there were several small sections of insulation board which were unsupported underneat by battons. These fell through the first time I jumped on the floor. Had to sort them out myself by putting nails into the joists


The builder didn't seem inclined to insulate between the last joist and the wall. To avoid 'thermal bridging' I filled the narrower of the gaps with expanding foam and the larger gap with Cellotex.
That expanding foam is messy old stuff, but it's effective. No drafts will be getting through this floor!


Nick hsa constructed a temporary roof until the gazing arrives - but it seems to be letting in a worrying amount of water! And looks like plenty more rain on the way :-(


Nick can't take the scaffolding down until the coping arraves (should be this week hopefully).


No sign of the plummer yet.......................................

Friday 19 October 2012

Halogen Vs LED Downlights

Pondering whether to go for LED downlights or stick with the traditional Halogen variety.

Summary of my research

  • LED Technology has come on leaps and bounds in the last few years.
  • It is now possible to get 6w GU10 LED bulbs that are about as bright as a 50w Halogen.
  • It is now possible to get warm white and warm colour bulbs - I guess whether you like the colour as much as a traditional Halogen is a matter of personal taste.
  • LED uses significantly less power (e.g. 6w Vs 50) and so is cheaper to run and better for the environment.
Despite all this I was still not completely convinced (I guess I've got a picture of piercing ice-white cycle lights in my mind).

However then I read this excellent analysis of how the economics work out.

Conclusion is LED pays for itself after 2 years and 9 months and should save about £160 per bulb over the lifetime of the LED bulb. I reckon I'll be getting 20 bulbs to that's a saving of £3,200 !!!

LED bulbs it is!

Thursday 18 October 2012

Rain rain, rain

Not much news or progress at the moment.

The roof is done except for the lantern and the coping for the top the wall.
There's not much more that can be done to the extension until the glazing arrives (ETA 27 Nov).

Nick has put tarporlines over the roof to try and get the extension to dry out but there have been a whole load of seriously heave showers in the last week. Not sure if was a great idea to install the floor insulation before the extension was watertight. The area near the door is looking like it is suffering...

We've had another tiler around to quote. They also said we need to lay at least 18mm WBP plywood to tile on (screwed with at least 300mm centers). As Nick is adament about putting 22mm chipboard down he also said we could lay Ditra matting to the chipboard and tile ontop of this (assuming the chipboard was also screwed down with at least 300mm centers). We'll see....

The next thing I'm expecing to happen is for Mike the plummer to lift the floor in the kitchen and start working on installing the new Boiler.
The boiler is a Worcester Bosch 24i Greenstar Condensing boiler.

And I'm going to spend some time this weekend making sure the insulation is completely air-tight (I'll seal gaps using expanding foam and silicone bathroom sealer).

Hope the rain abates!

Sunday 7 October 2012

Building the roof

Once the roof joists were in Nick laid 'firrings' on top which give the 'flat' roof a slight slop to help shed the water. Then 10cm of insulation board. Then 6mm of ply, then a breathable waterproof membrane. Should be ready to felt soon.

One area I have been thinking about and need to talk to the builder about is the void where the new joists join onto the joists from the existing house. This appears to be directly open to loft which i know from experience is very drafty and cold in the winter. Not much point putting in 10cm of insulation to have the space underneath open the draft loft! I guess its an  easy solution like stuff in some fibreglass, but its details like these that are keep me up at night!

Lastly we are still getting quotes and speaking to tilers. Tiling on 22mm chipboard as the builder would do appears to be a definite no, no. Mainly because chipboard has been known to turn to wheetabix if it gets moist - not an ideal tiling substrate! Laying 25mm ply to the whole area would be the best solution but would cost £1000 just for the ply board. After quite allot of research (there's so much contradictory evidence, and people regurgitating old wife's tales) I'm thinking the way to go will be get Nick to lay 22mm OSB board down, which is a little maybe double what the cheapest chipboard is, but its apparently far more robust and be more rigid for tiling on. Then Ditra isolation matting then the tiles. It's looking like it will end up costing me double what I had originally anticipated when I expected the floor was going to be constructed from a solid slab....

The lead guy turned up this morning to make all the flashing for the roof. He was a really nice chap. He said he had done the lead work on the domes at the Greenwich Observatory - so that can't be bad!


Friday 5 October 2012

Coping

No this post is not about my fragile mental state! I discussed what coping I wanted to go on the parapet with Nick today. I had looked at some really lovely examples made from reconstituted stone in a kind of bath stone \ Buff colour, but they were seriously expensive. As the wall is 30 thick would be looking at a 40cm wide Coping. With a 17m run to do that's a lot of stone. Looking at £600+.

In the end I went with nicks choice which was to use a Buff coloured concrete coping. Much cheaper and should pass muster. At the end of the day it's got to go on top of a 10 foot wall so it's not exactly a central feature

Wednesday 3 October 2012

Insulation mare!

Just a quick update on the latest issue I have been having with the insulation that goes in between the outer and inner walls of the extension...

Decent insulation was a really important element of the design as we are having well over 25% of the floor area as glazing in the roof and walls. To do this and stay on the right side of building regs you need to show you are going to have zero carbon impact ( relative to having exactly 25% glazing) so you need to have an SAP report done to asses the CO2 impact from heating compliant and actual extensions. Initially the architect suggested we applied to build a conservatory (which are treated much less vigorously) and then nock through AFTER building control had signed off. I have no idea how common this practice is but I decided for the sake of a couple of hundred quid it was not for me. We got the report done and passed building control. Sorted!

Something had been bothering me for days then it struck me. My builder had attached the 5mm insulation boards to the outer leaf of the wall (within the cavity) my trusty Haynes extension manual which I fully recommend, http://www.amazon.co.uk/Home-Extension-Manual showed it attached to the inner block wall which made sense to me. I queried this with the builder who said it was fine then I queried it with the manufacturer who said it was definitely not fine!!! The walls had already been built up to ceiling level what a nightmare!!!

I decided to call building control and check what they thought. They agreed with me, but it turns put one of them had already been on site yesterday and had signed it all off. Unbelievable what I paying the (£450) for???

Building control turned up today said there had been a complaint (pissed my builder right off!!) and told them to sort it. Back tomorrow to check. Called my builder today to clear the air. Oh dear.......

Tuesday 2 October 2012

Installation of Steels

Builders had a lot of fun putting the steels onto the roof.


The video below shows the first steel being lifter - this was the tricky one as it had to go nearest to the existing building - check out how close it gets to the bedroom window...... Phewww!


#

Steels in, scafolding up and get cracking with the roof!

I was really keen that the roof level in the extension was the same as in the existing kitchen. The architect initially agreed this was OK, then after he showed his builder around changed his tune and said the extension roof would be the same level as the botton of the steel across the opening to the kithchen. Strange as my builder has managed to construct the roof (and floor) such that joists are at exactly the same level direction as the existing. So good result there. You can see he has notched the roof joists into the steel. The hole in the middle is where the roof lantern is going to go in case you were wondering :-)