Friday 28 September 2012

Serious steel yeah baby!

OMG!!!
Steels for the roof arrived today. They are absolutely enormous!

But they were not put in today I think because the crane did not arrive on site in time.

You can see on the slightly shorter steel a flange welded on where the facing bricks above the bifold doors will go. None of which the architect specified of course...

Tuesday 25 September 2012

Walls going up

Four Builders on site beavering away today

It was too rainy for the builders to work yesterday and will likely be too rainy tomorrow too. But today Nick turned up with three of his crew and they really got cracking.
really good progress from DPC level today


This shot gives an idea of what the scale of the opening for the doors will be - MASSIVE!

I'm sure there's a proper building term for the way they have added new bricks in with the existing pattern...

6m opening for the bifolds. Remeasured and confirmed with P&P Glass on the phone today.


Here you can see the joists hung into existing exterior wall with noggins added. Insulation will be added between joists then Underfloor heating (poly pipe system for suspended floor) then the final layer which is still TBC.

Fun With The Building Inspectors

Not one but two building inspectors turned up today to inspect footings and work up to DPC level. Apparently they were happy with the work so far. But Nick discussed at length details of the steels required. The main problem is that the architect failed to draw all the steels on the plans submitted to Building Control, but Building Control did get the structural engineers report. Problem is that when I hired nick he did not want to look at the engineers report on the assumption that the architect would draw the steels on his plans. Bizarrely the architect did draw on on two of the steels but not the ones in the roof. Building control are (quite rightly) insisting that all the steels are installed, but unfortunately this is all going to be extra cost that was not covered in the original quote... now I know why I budgeted 15% contingency!
 
One other thing worth mentioning is the uncertainty we are having over what the top flooring will be. As I mentioned before originally the plan was for a solid concrete floor that we would lay tiles over. But then due to the existing air bricks building control advised we should use a floating floor. Nick is planning to lay chipboard over the joists (obviously the cheapest solution) but my research on the interweb strongly suggest that tiling on chipboard really not a good idea. Tiling on ply is ok but ply is five times the cost of chipboard. (I have a tiler on site to quote on Friday so I'll let them and nick argue it out). The other option I have been considering is engineered oak (6mm oak over 15mm ply) floor boards. The floor would be absolutely gorgeous but I'm not convinced it would be the most sensible choice in the kitchen and with small children spilling crap on it every 5 minutes. Also Nick was pretty adamant that they couldn't be laid directly onto the joists (even though the manufacturer says this is OK). I'm going to call the manufacturer tomorrow to check. So need to look into this further...
 
On a personal note my chest infection has laid me low today and doc has advised me to take it easy,
 

Tuesday 18 September 2012

24 hours later...

Well what a 24 hours it has been!


CRISIS #1

The fun started yesterday when I showed my builder the picture below which shows the style of roof I am after.

The plans show most of the major details but the main reason I showed it was to clarify the type of parapet capping, which as you can see is done very nicely in the picture. 

However, my builder was somehow under the assumption that he was building a flat roof without any parapet! I'm scratching my head as to how such a key feature of the design seems to have gotten lost in translation. Below is the building regulations plans, which were included in the pack I gave to all of the builders I got to do a quote:


Now, before we decided to go ahead with my builder Nick we did talk at length about various details and I have to admit not being a builder some of it went over my head, but I was under the assumption that he was going to quote what was specified in the plans!

Anyway, whether it was me not paying attention to what he said or Nick not looking at the plans closely enough we seemed to be on different pages. Nick had had quoted in the roof effectively being like a flat garage roof with facia board and guttering running across the roof line. I had a pretty restless night thinking about whether to go with this or to dig my heels in and insist we stick with the original plan (and suffer any extra cost he had not covered in his original quote)... Then at about 3am I decided that we would stick with the original plan.

Once Nick had a cup of tea in his hand on site this morning I broke the news to him. What I probably should have made clearer in the in the first place was that we went with the whole Orangery style (with parapet) as we didn't want it to look like a flat roof extension (and couldn't have a pitched roof due to the existing bedroom dormers). So we're back on track and sticking to the original plans (yet to agree the extra cost, but one of the reasons we went with Nick was his reputation for being open and fair with costs etc.).

CRISIS #2

Today P and P glazing (who I selected to source and install the roof lantern and bifold doors from) were on-site to do the survey and go through the details with my builder when I was present. Gary, from P&P was very professional and helpful and I really felt he was in control of everything needed to make sure the installation goes smoothly.

The fun really began when we tried to nail down the size of the roof lantern. In the initial drawings done by the Architect the width of the roof lantern was something like 1.51m. During my research into roof lanterns and the work I did in getting quotes (in particular Ryan from Thames Valley Windows who was extremely helpful and I would be very happy to buy from in future) It was pointed out that this was a very narrow width for a roof lantern and in fact nobody I spoke to had ever installed one that narrow. So fairly late in the day I had the architect increase the width to 2.1m which was what was in the final building regulations plans signed off by Wokingham building control.

Here is the plan:


So far so good...

When Gary from P&P saw the plans he commented that it was frequently the case that the lantern size would be set so as to achieve the same 'shoulder' all around on each side of the lantern. I think this thought had always been in the back on my mind too, but having already changed the size once I was (stupidly) reluctant to change it again. Nick and Gary were confident that building control would not stress about such a change so we decided to go ahead and do this. The result should be a shoulder of 80cm all around the lantern to the wall. Unfortunately, this will (of bloody course!) add to what I was originally quoted, but should be well worth it.

CRISIS #3

Wait it gets better... This is a peach!

During the course of sorting out the size of the roof lantern we noticed that the plans didn't seem to scale correctly. We then decided to double check the width of the extension, which you can see on the plan is marked at 8.3m. Imagine our shock when we found the correct measurement was actually 8.75m!

I'm not in the habit of bad mouthing people so I'll let you the reader decide if you would want to use an architect that can't get the most key measurement of the whole project correct and forgot to draw on the depth of the extension altogether (their name is splashed all over the plans above if you’re interested).

TIP: Always double check all measurement your architect has made! Assume he is an idiot!

This means that the builder has under quoted and will (quite fairly) have to revise his quote upwards. The size of the roof lantern is also going to be that much bigger too. I'm trying to stay philosophical as these would be the actual costs anyway if the measurements had been accurate in the first place...

But an expensive day all in all...

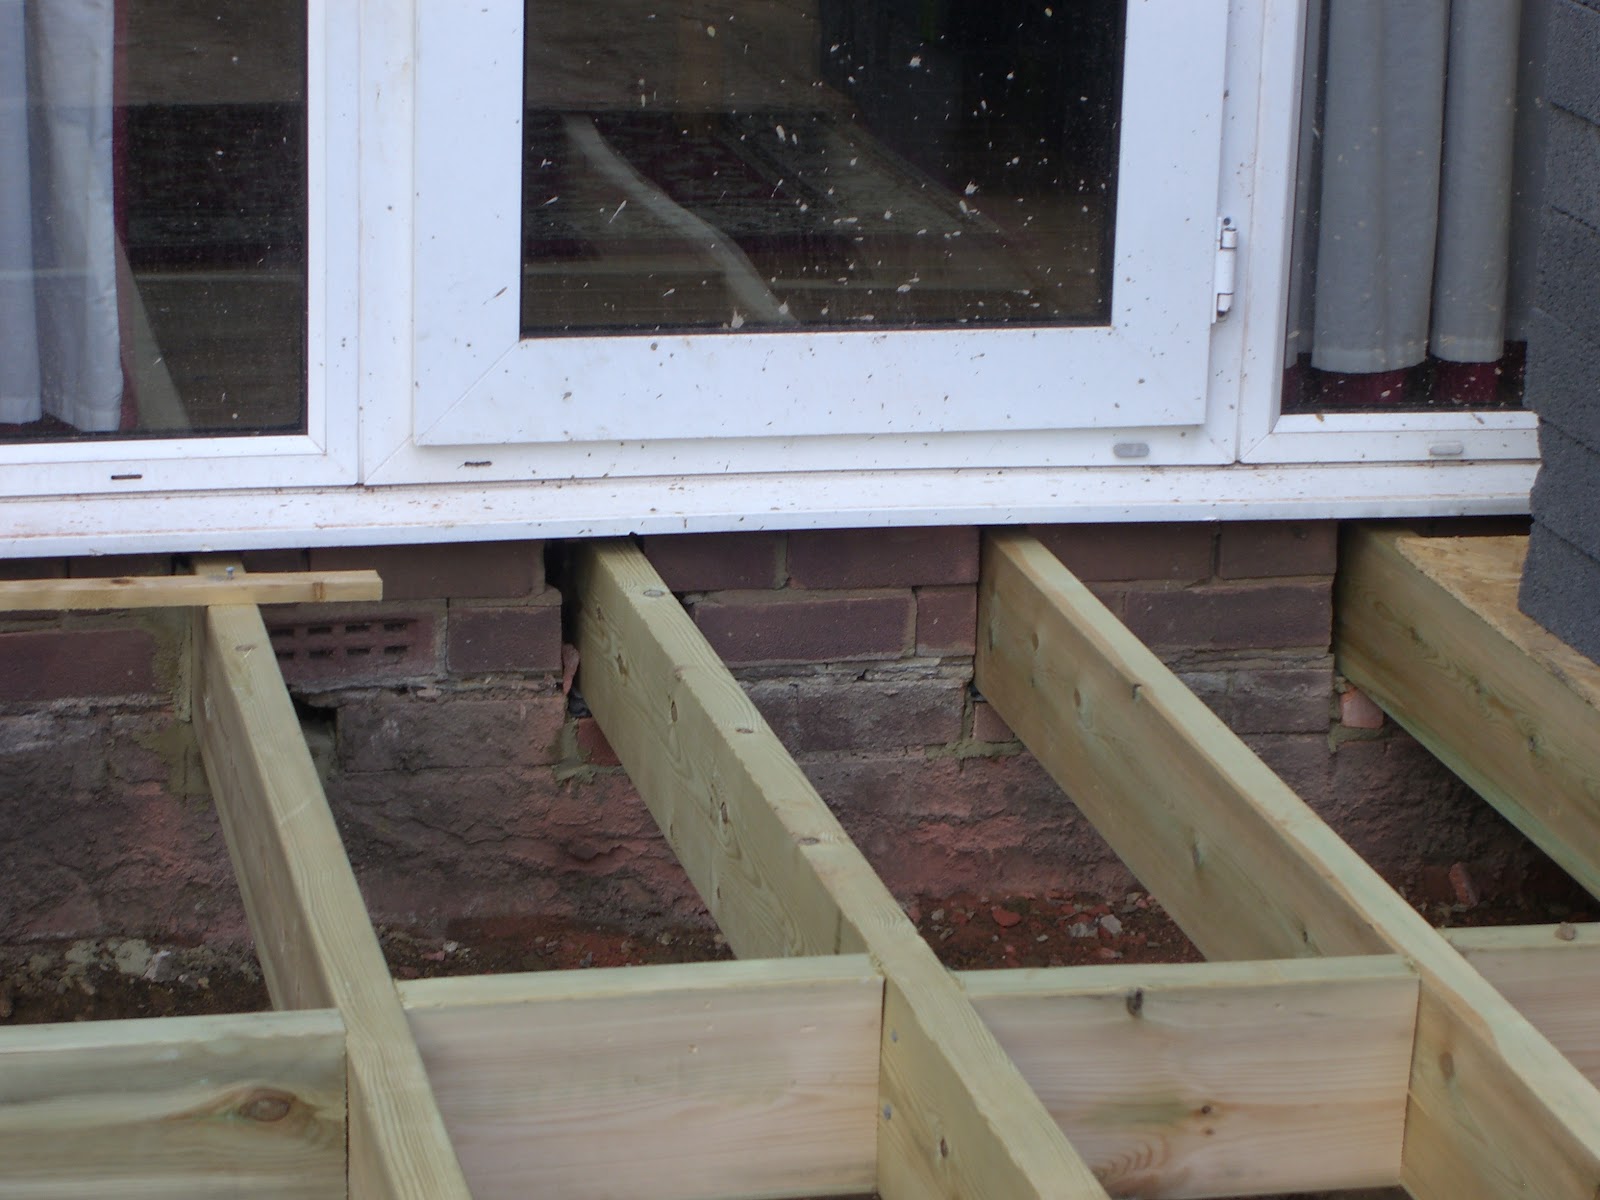
One last thing to say was that Gary was very helpful and organised about making sure everybody was clear about what the final floor level and sill level for the doors needs to be in order to get the threshold just right. I decided to go for a weathered threshold, but this will be recessed into the floor so that only a strip 10mm high and about 4mm wide will protrude above floor level. The decking (or patio if we go that way) can be built up to just 25mm below the interior floor level. This seemed like a very reasonable compromise to achieve a fully weathered threshold, but will look (as good as dammit) like a flush threshold. Nick now knows where he needs to build his rafters to, insulation goes between the rafters and does not add thickness to the (suspended timer) floor, Mike the Plummer has confirmed that the pipes for the under floor heating will be notched into the rafters and so will not add more than 1 or 2 mm. Then Nick is going to put 22mm chipboard, then the tiles and bedding!
What could go wrong...?

It’s been a bit of a crazy day, but I'm now feeling much more comfortable that all these details have been properly sorted out and I'm going to end up with exactly that I had in mind.

Next time around I will take absolutely nothing for granted!

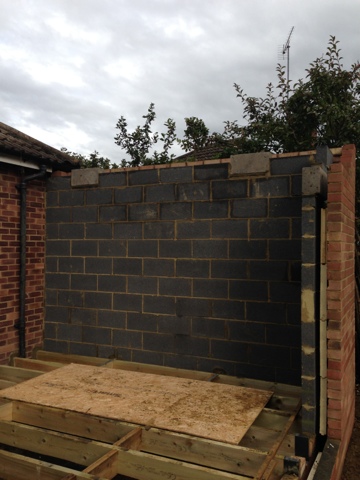
Anyway the walls are going up


Monday 17 September 2012

Footings are done.

Here are some photos of the almost completed foundations.

You can see the shuttering in place where it was necessary to bridge over the sewer.


And this is what a 1m deep trench of concrete looks like!


Shutters in place for bridging of sewer

These builders look so young.

Two lorries turned up this morning and dropped off a large amount of sand and bricks. Sadly they also took the dumper and digger back with them!

Meanwhile I've been suffering a chest infection for the last week and am off to the Doctors this morning -  good job its not me building this thing...


Friday 14 September 2012

Concrete

Yay! Concrete is in. Great first week. Well done nick. Will post pics tomorrow.

Thursday 13 September 2012

Bigger hole

My garden now officially looks like the Somme...


Two of the three tranches required are done


Nick hiding from the building inspector (Just kidding Nick)


Hole for the soak-away. The hedgehog is having to move house

The utility room has just about gone now too, unfortunately Nick couldn't demolish the rest of it as I was too lazy to move the washing machine on Sunday evening!

I will not be sad to see the back of the timber cladding!

Building control are due on site today and the concrete lorry is provisionally booked to come and fill the holes on Friday. Would be a good weeks work if that happens.

Wednesday 12 September 2012

Underfloor heating with suspended timber floor

Builder is back on site today after a day off to finish up his other job.

I want to ask him how the underfloor heating will work if we go with a suspended wooden floor. I have seen a some examples of this on the interweb but it will be quite a different construction from the originally planned concrete slab. From what I can tell the idea would be to insulate the wooden floor from underneath with rigid (presumably 'kingspan') insulation between the rafters and then lay the underfloor heating on top. Finally and all importantly a layer of some sort of concrete screed would be required on top to provide thermal mass. Well I'll report back when I've caught up with Nick.

In the last few days after a great deal of research and gathering of quotations I have selected the bifold doors we are going to order and the specification/supplier/fitter of the roof lantern that will go in the middle of the roof. Getting the roof lantern and doors sorted out has almost been as much work as finding a builder and specifying what we wanted done. Mind you this is fully justified as it's a major part of the whole project (both financially and architecturally). Anyway, this is one area I really wanted to share my experience as I found surprising little online with regards people's experiences in going through the selection process. Suffice to say I think I've got a really great spec which should look fantastic when it's all done and dusted.

I have an on-site survey meeting with the glazing company and my builder this Tuesday to go through it all. I am told it will take 10 weeks from survey to installation (doors are made to order in Germany - sorry UK economy, money to bail out Greece has to come from somewhere...), which would mean we would be watertight on November 27th.

Tuesday 11 September 2012

How big?

Strange, the latest (approved) building regs plans the architect drafted do not specify the depth of the extension! It should be 4m. Hmmmm.

Looks like there may already be a change of plan with respect to the floor. Plans show solid slab but as existing is suspended timber and the are several air bricks which can't be covered building control and builder are recommending we use suspended timber for extension.

Somewhat worried at what else is going to have to change!

Sunday 9 September 2012

And we're off

Work starts at 8am. Need to give my builder (Nick) number for wokingham council building control so he can tell them he's starting digging the footings.

Also need to tell him there is a 10 week lead time on the bifold doors I'm looking at, and see what he thinks of that! (I'll write a detailed post on selecting bifold doors when I get the chance)

Fingers crossed I should be able to post pictures of some holes tonight!

Lull Before the Storm!

Right here we go. Its been months in the planning but, at last, the building work for my extension starts tomorrow. I found that the information I obtained online has been invaluable in helping me figure what I'm doing so I'm returning the favour by creating this blog (feel free to feed the fish).

All being well, I'll document how everything goes over the coming weeks and months and hope that it is of interest and may have some useful information for anyone thinking about an extension. Hope you can follow along - Enjoy!

Been in the garden trimming back hedges etc. ready for the builders arriving at 8am tomorrow. They would have done this - but i wanted to see what the site look like cleared and try to save a few of my favourate shrubs in the process...

Anyway this is how it looks before building starts.